Sign in with Ethereum and self-managed naming
· 5 min read

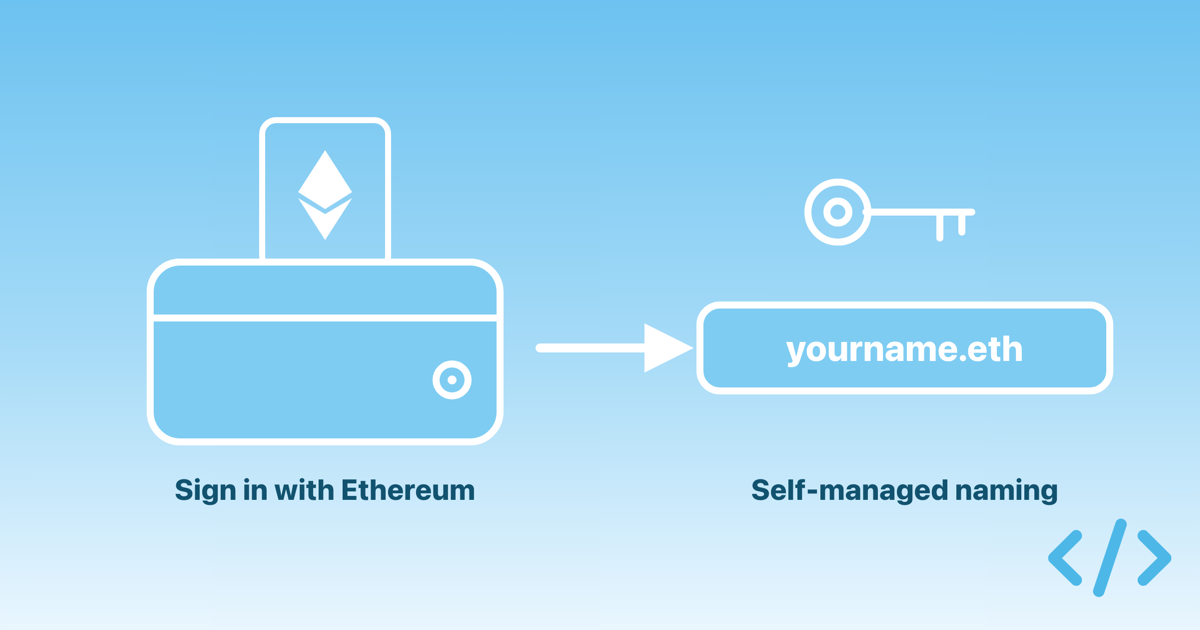
The Enscribe dashboard now supports Sign-In with Ethereum (SIWE). You can create an account and log in with your wallet, without an email address. Alongside this, we added a self-managed naming mode for wallet accounts, where you keep control of your ENS name and sign every change yourself.
Until now, the dashboard only offered email sign-up. That works well for teams, but individual users who don't want to share their email were limited from using Enscribe. Wallet sign-in removes that step: your wallet is your identity.
![Enscribe at EthCC [9] cover image](/assets/images/cover-2328ae5351f8702945807aefef4c78e8.png)