Reflections on ENS Contract Naming Season
· 6 min read

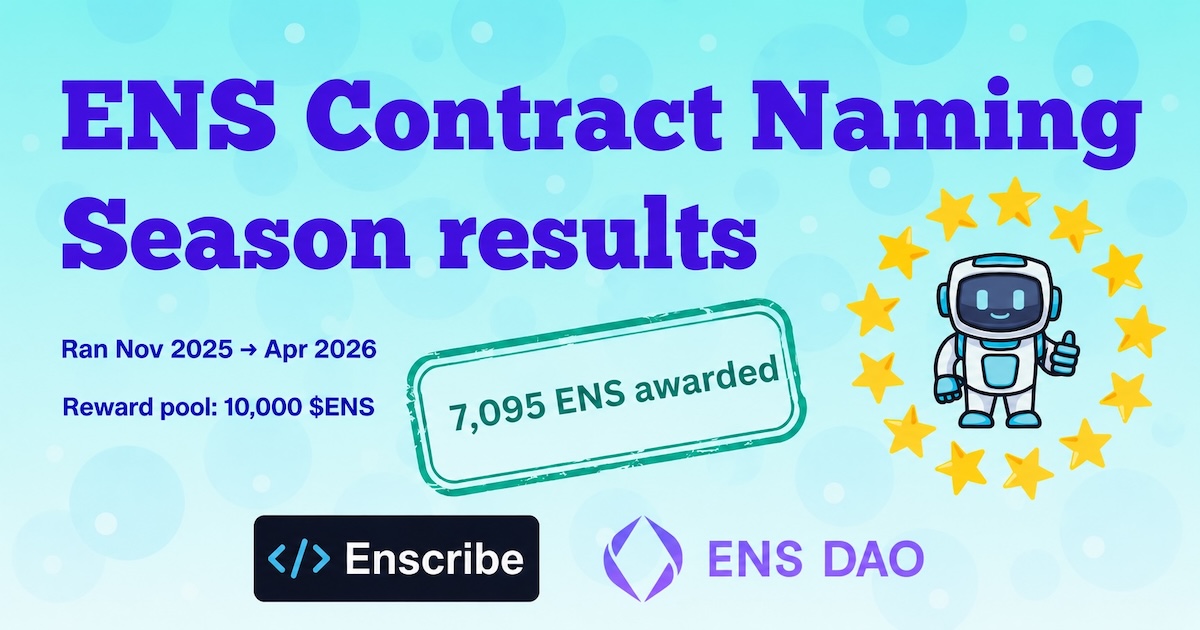
With May upon us, ENS Contract Naming Season has come to an end. It has been six months since the initiative launched in November, and it is time to reflect on the journey.
Ethereum Name Service
View All Tags
With May upon us, ENS Contract Naming Season has come to an end. It has been six months since the initiative launched in November, and it is time to reflect on the journey.
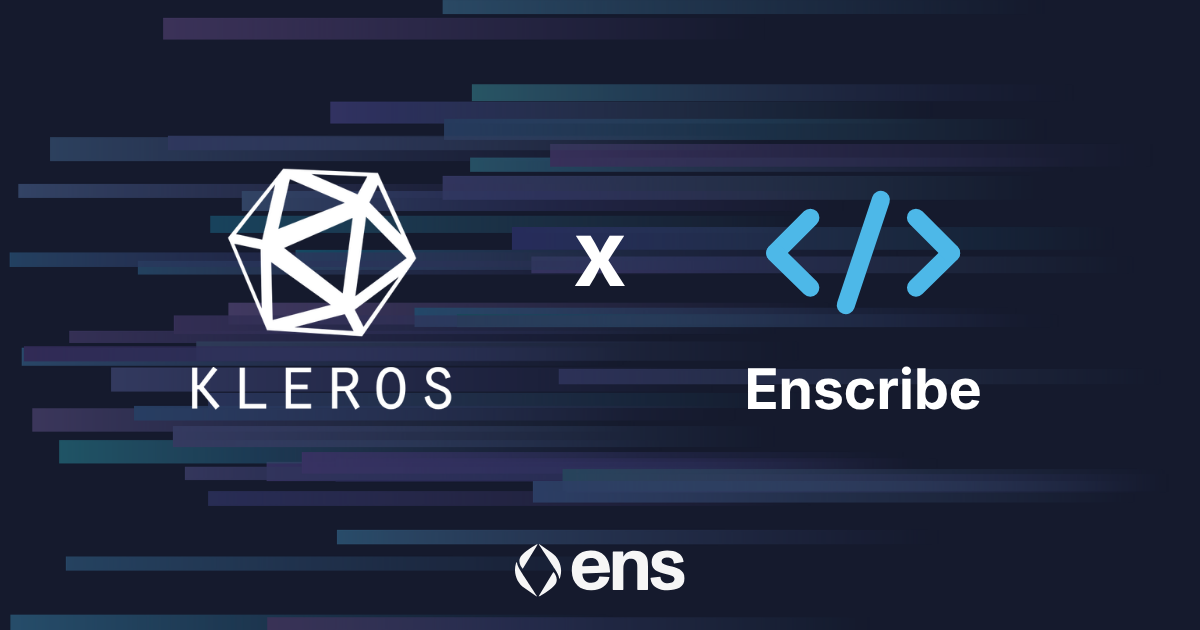
Kleros has adopted Enscribe-powered ENS naming across its smart contract infrastructure as part of Contract Naming Season.
Kleros is a decentralised arbitration protocol on Ethereum, providing dispute resolution for use cases ranging from escrow and curated lists to oracles and insurance applications. Its Kleros Curate system also maintains a database of more than 2,600,000 verified smart contracts, tokens, and addresses that's relied on by Etherscan, Blockscout, MetaMask, and Ledger.
For a protocol whose work depends on trust and verification, contract identity matters.
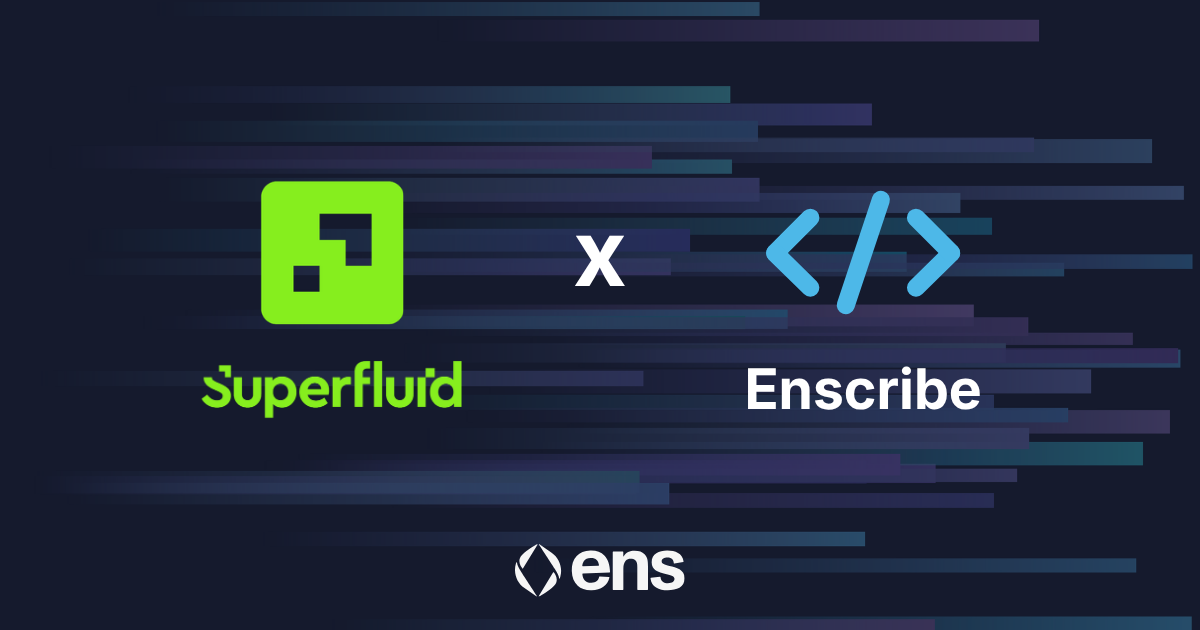
Superfluid has adopted Enscribe-powered ENS naming across its smart contract infrastructure as part of Contract Naming Season.
Superfluid is onchain financial infrastructure for programmable, real-time value transfer. With more than $1.6 billion in volume, more than 1.2 million wallets, and 50,000 active users across 11 EVM networks, Superfluid powers payment infrastructure for organisations including ENS DAO, Optimism, and Gitcoin.
One of those organisations happens to be ENS DAO, which uses Superfluid to stream grants and contributor payments. There is a nice circularity to this announcement: the protocol that streams payments for ENS DAO is now using ENS to name its own contracts.
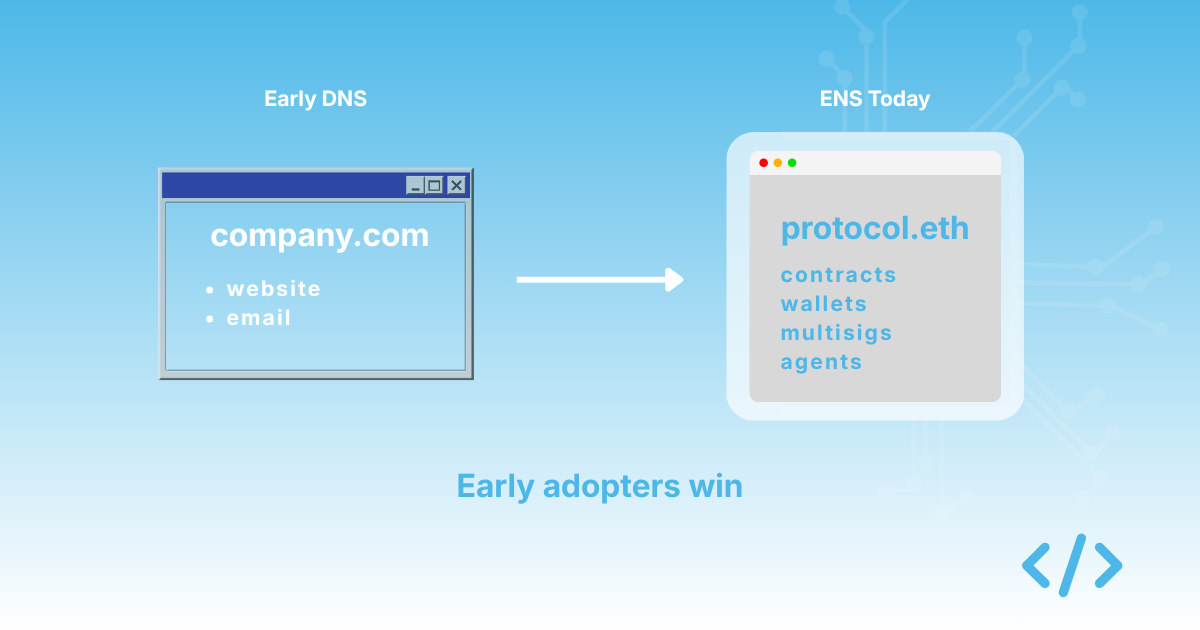
In 1995, most organisations did not have a domain name. The ones that did were not always sure what to do with it. Email and a static website were considered ambitious uses. The idea that an organisation might one day operate the bulk of its identity, infrastructure, and customer relationships through structured DNS namespaces would have seemed unlikely to many business leaders.
A small number of companies were thinking differently. They saw the trajectory of the internet, recognised that their organisation was going to need to operate in this new environment, and started building the structures that would let them do it. They registered their domains early. They thought about subdomains for departments, products, and services. They put email addresses on business cards before most of their competitors knew what email was for.
Five years later, those companies looked prescient. Ten years later, they looked obvious.
I think we are at a similar inflection point with onchain identity, and the parallel is worth taking seriously.

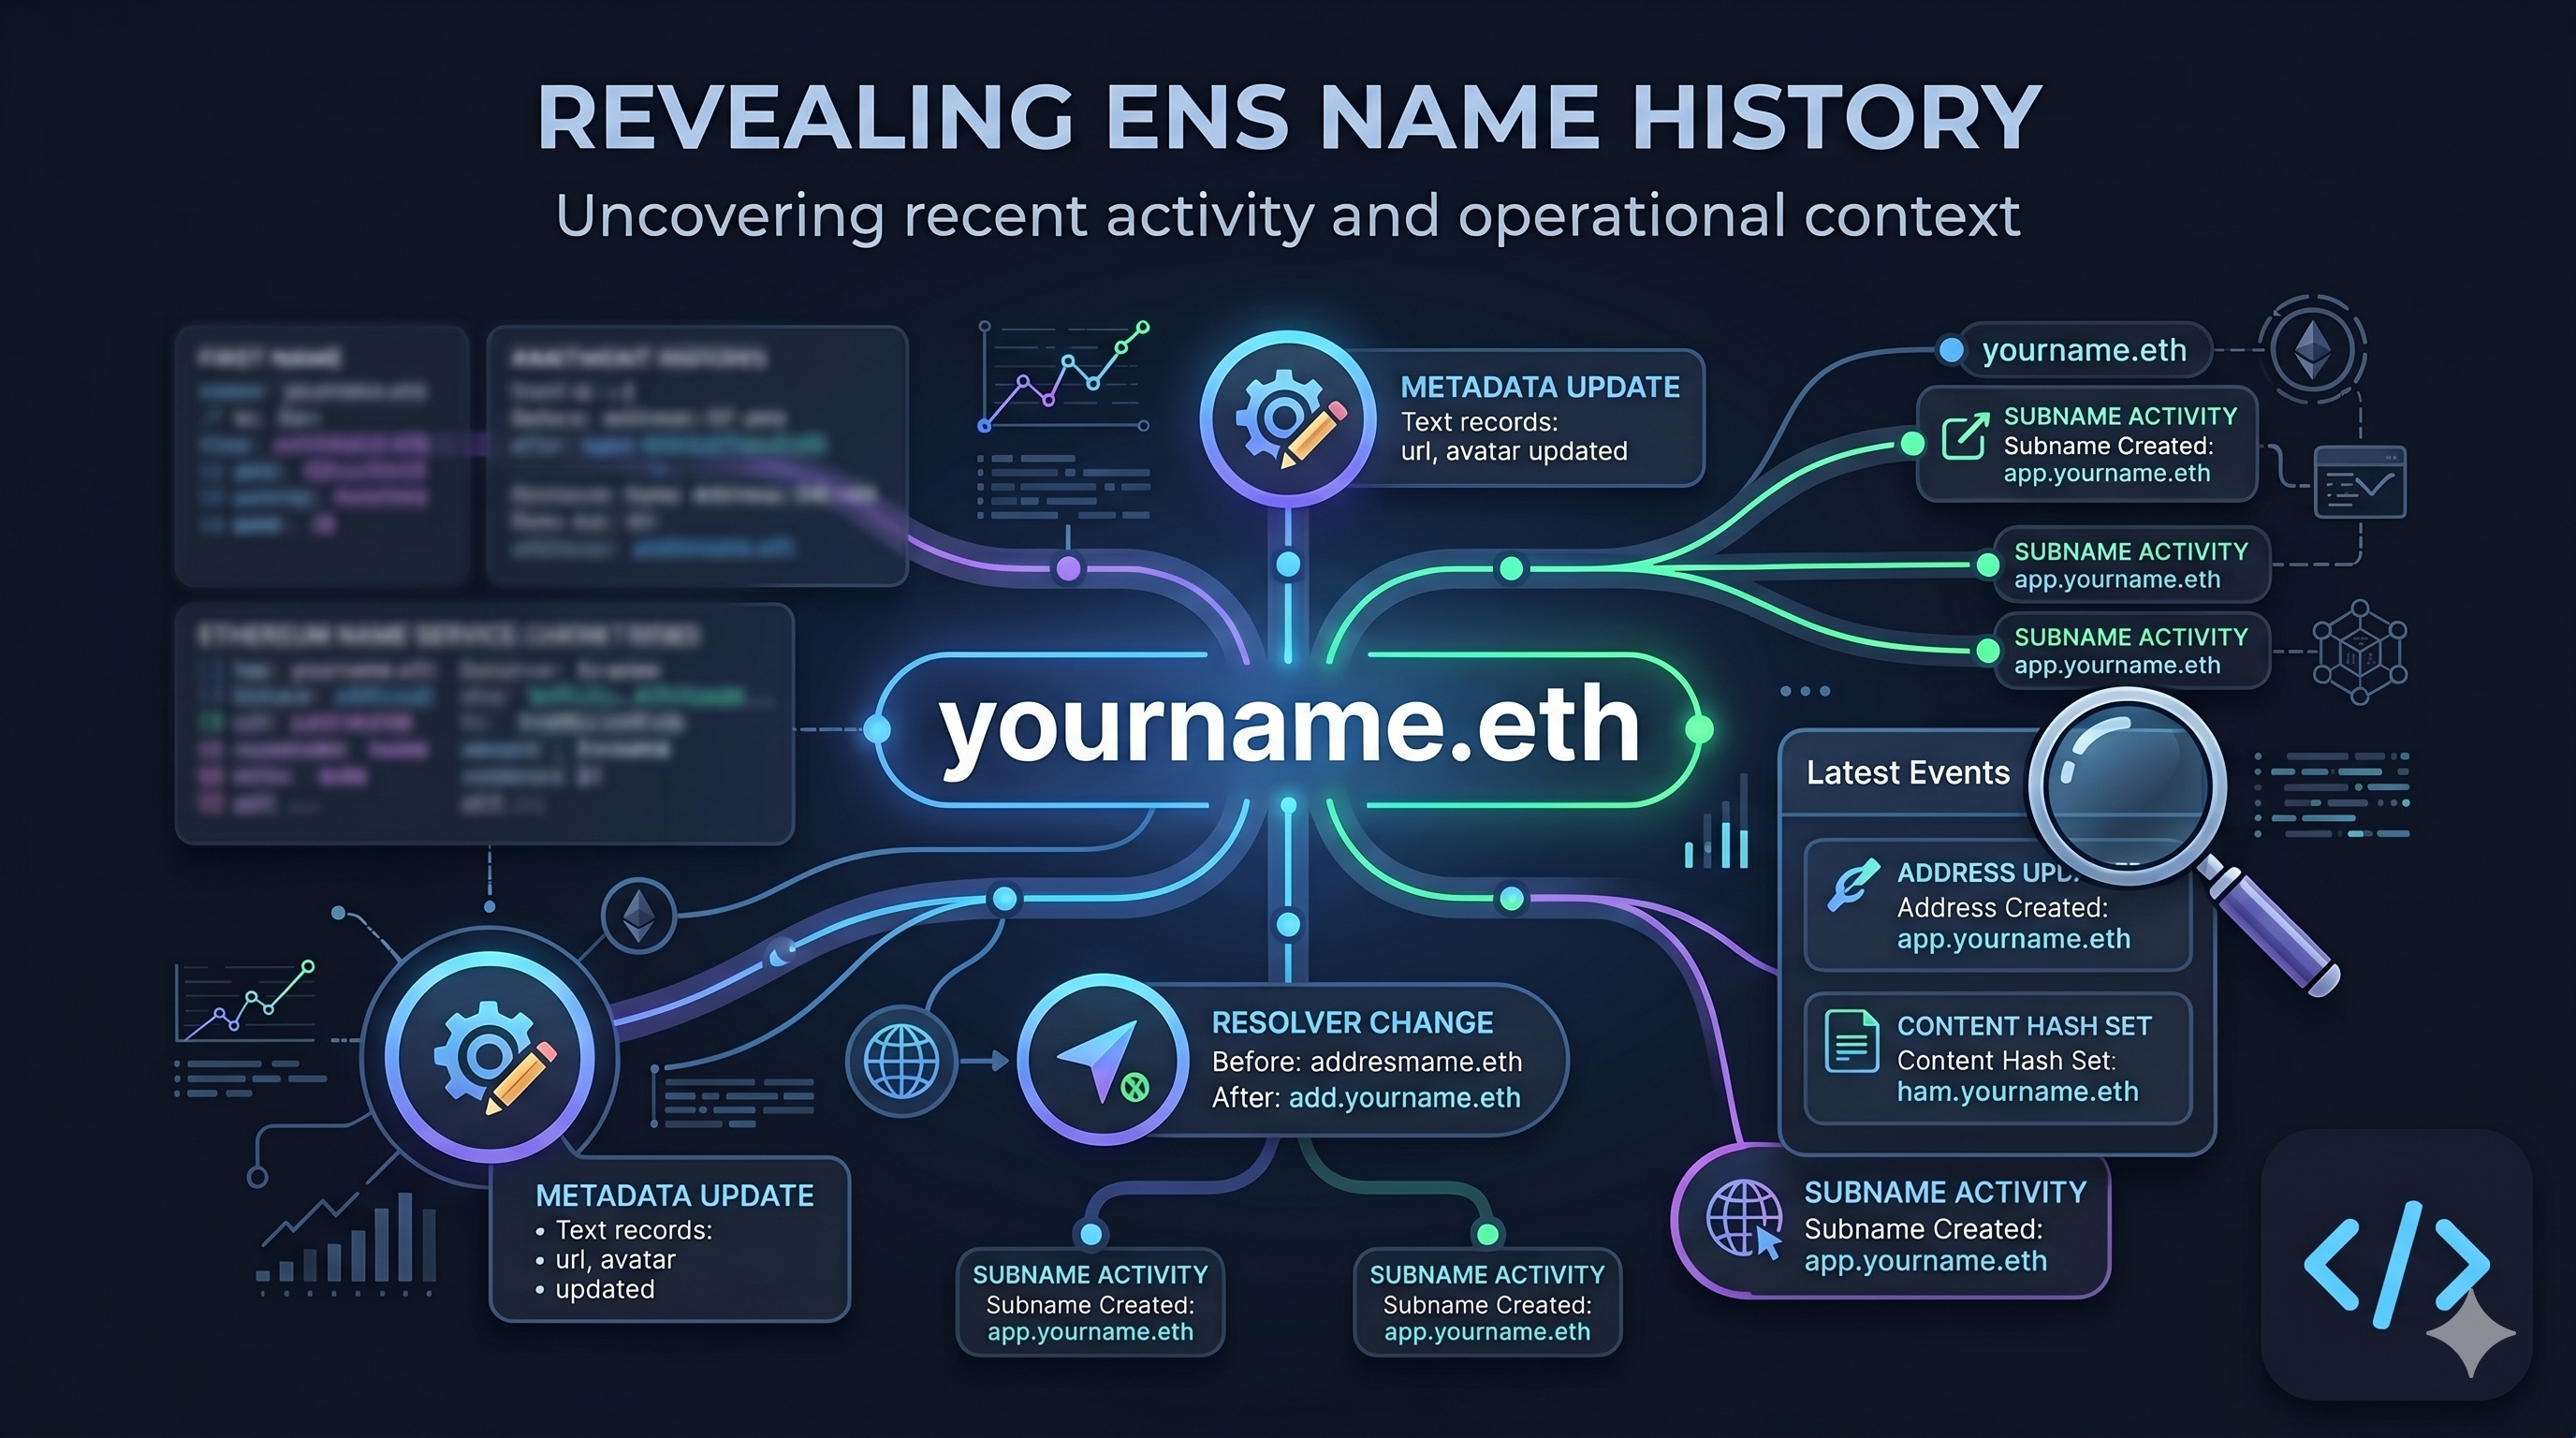
It is important to know the history of a name, especially when you want to understand how a name has changed over time.
That's why we have added a new Name History section to the Name Explorer & Contract Details pages in Enscribe. It gives you a compact record of recent activity for a name, including metadata updates, resolver changes, and subname activity.
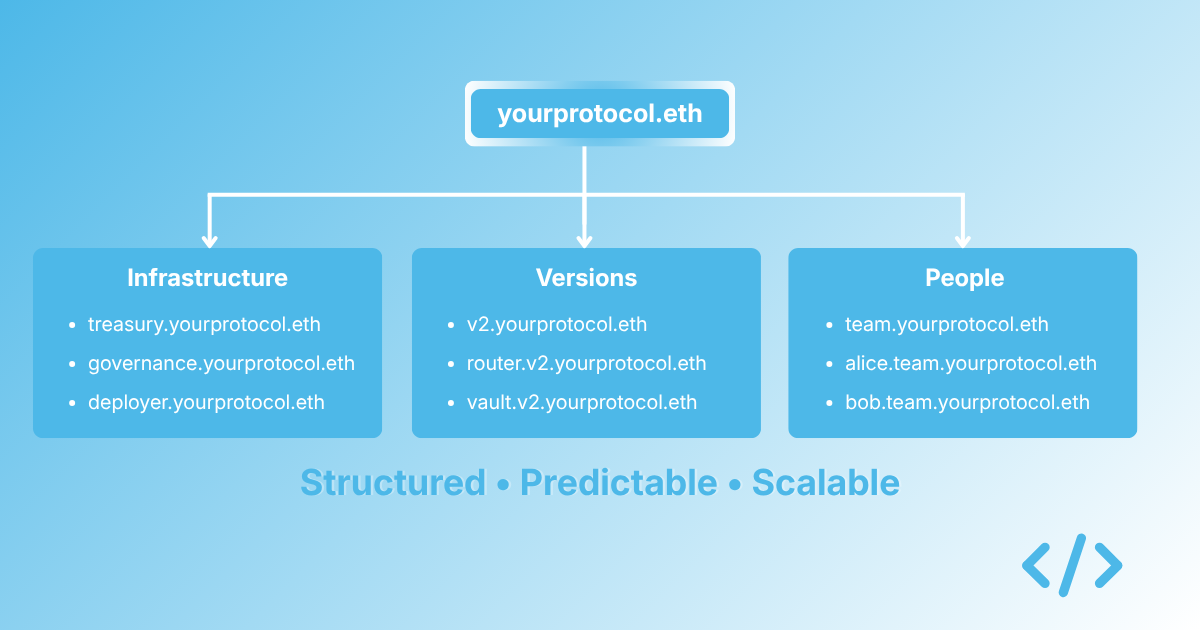
Most teams approaching ENS for the first time start with the same question: what do I actually name? It sounds like a small question, but it is usually the hardest part of getting onchain identity right. Get the structure wrong at the start and you can spend years unpicking it. Get it right and everything that comes after is much simpler.
The good news is that we do not need to invent the answer from scratch. Three decades of DNS have already given us a set of patterns that work well, and most of them translate directly to onchain identity.
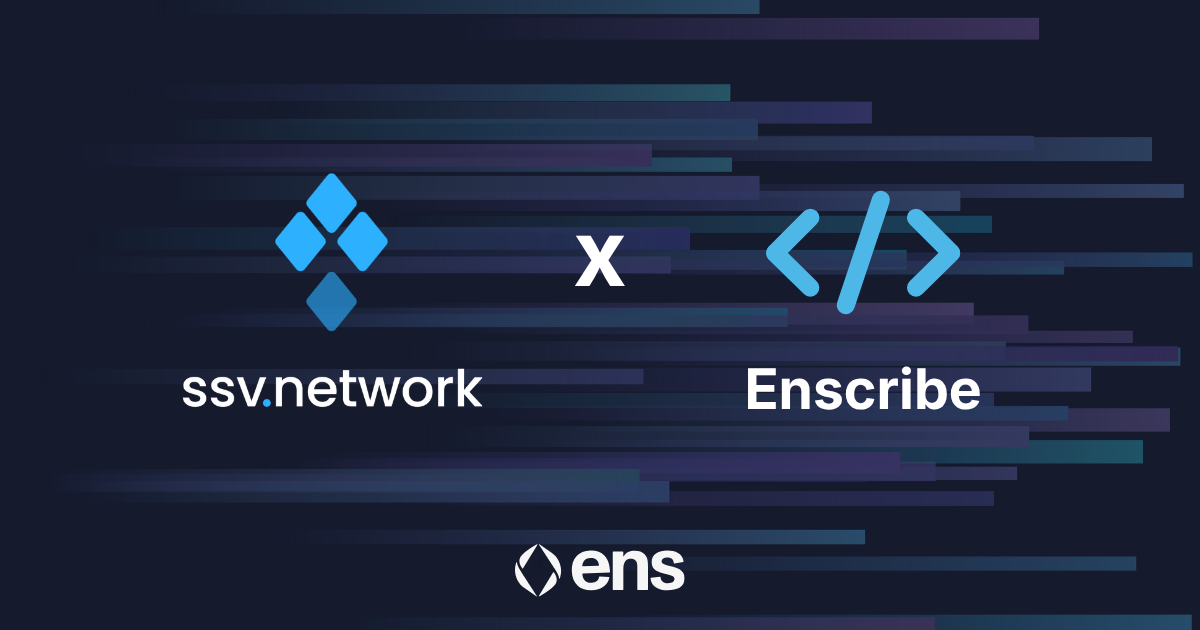
SSV Network has adopted ENS-based naming across its smart contract infrastructure as part of Contract Naming Season.
SSV is a leading implementation of Distributed Validator Technology on Ethereum. Its protocol distributes validator keys across multiple independent operators to reduce single points of failure in staking. With more than 7.5 million ETH secured and roughly 19 percent of Ethereum validators running through its infrastructure, SSV is one of the more important pieces of staking infrastructure on the network.
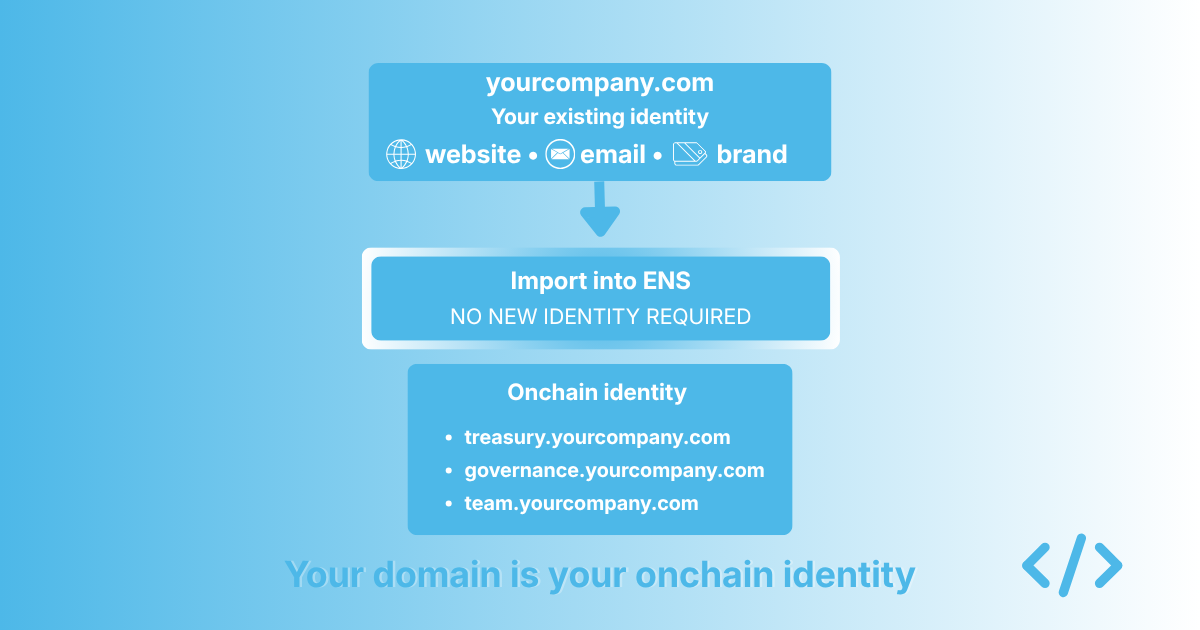
The most common reason organisations give for not using ENS is not technical. It is not cost either, though that gets mentioned. The real reason, when you talk to enough teams, is that they do not want to manage another identity.
They already have a domain. They already have a brand built around it. Their users know them by it. Their email runs through it. Their website lives on it. Adding a separate .eth name on top of that feels like duplication, and duplication is something experienced operators try to avoid.
There is a related concern that gets voiced less openly, but matters just as much. Their existing domain comes with legal protections they have come to rely on, including trademark coverage, dispute resolution mechanisms, and decades of case law. ENS does not have an equivalent legal layer today. For organisations with valuable brands to protect, building part of their identity on a system without those protections is a real concern.
These concerns are reasonable. They are also both addressed by something most teams do not realise ENS supports.
ENS has supported DNSSEC-enabled DNS names for years. In practice, that means if your organisation already owns a DNS domain such as yourcompany.com, you can import that name directly into ENS and use it as your onchain root. You do not need to register a .eth name. You do not need to manage two identities. You do not need to give up the legal protections attached to the domain you already own.

![Enscribe at EthCC [9] cover image](/assets/images/cover-2328ae5351f8702945807aefef4c78e8.png)
The Enscribe team was at the latest edition of EthCC, and we had a talk on the agenda: Smart contract identity for orgs and agents.