Viewing Calldata to Simplify DAO Smart Contract Naming

We created the Enscribe App to make it as simple as possible for teams to name their smart contracts. However, this approach is not always compatible with naming DAO contracts.
What we’ve noticed is that DAOs often use a high-level function wrapper that needs to call multiple transactions required to name a contract.
This requires multi-sig high level transaction calling a method such as execute() or executeTransactions() which wraps over executing multiple transactions, each represented by a calldata – an encoded form of a function call along with its arguments.
To make this kind of name setting easy, we’ve shipped a small feature in Enscribe that enables displaying call-data previews.
How to View Calldata?
In the Enscribe App, there is now a new collapsable Advanced Options section. Open it and you’ll see a calldata section that shows a list of the transactions Enscribe will execute for your naming flow — including items such as subname creation, forward resolution, and reverse resolution.
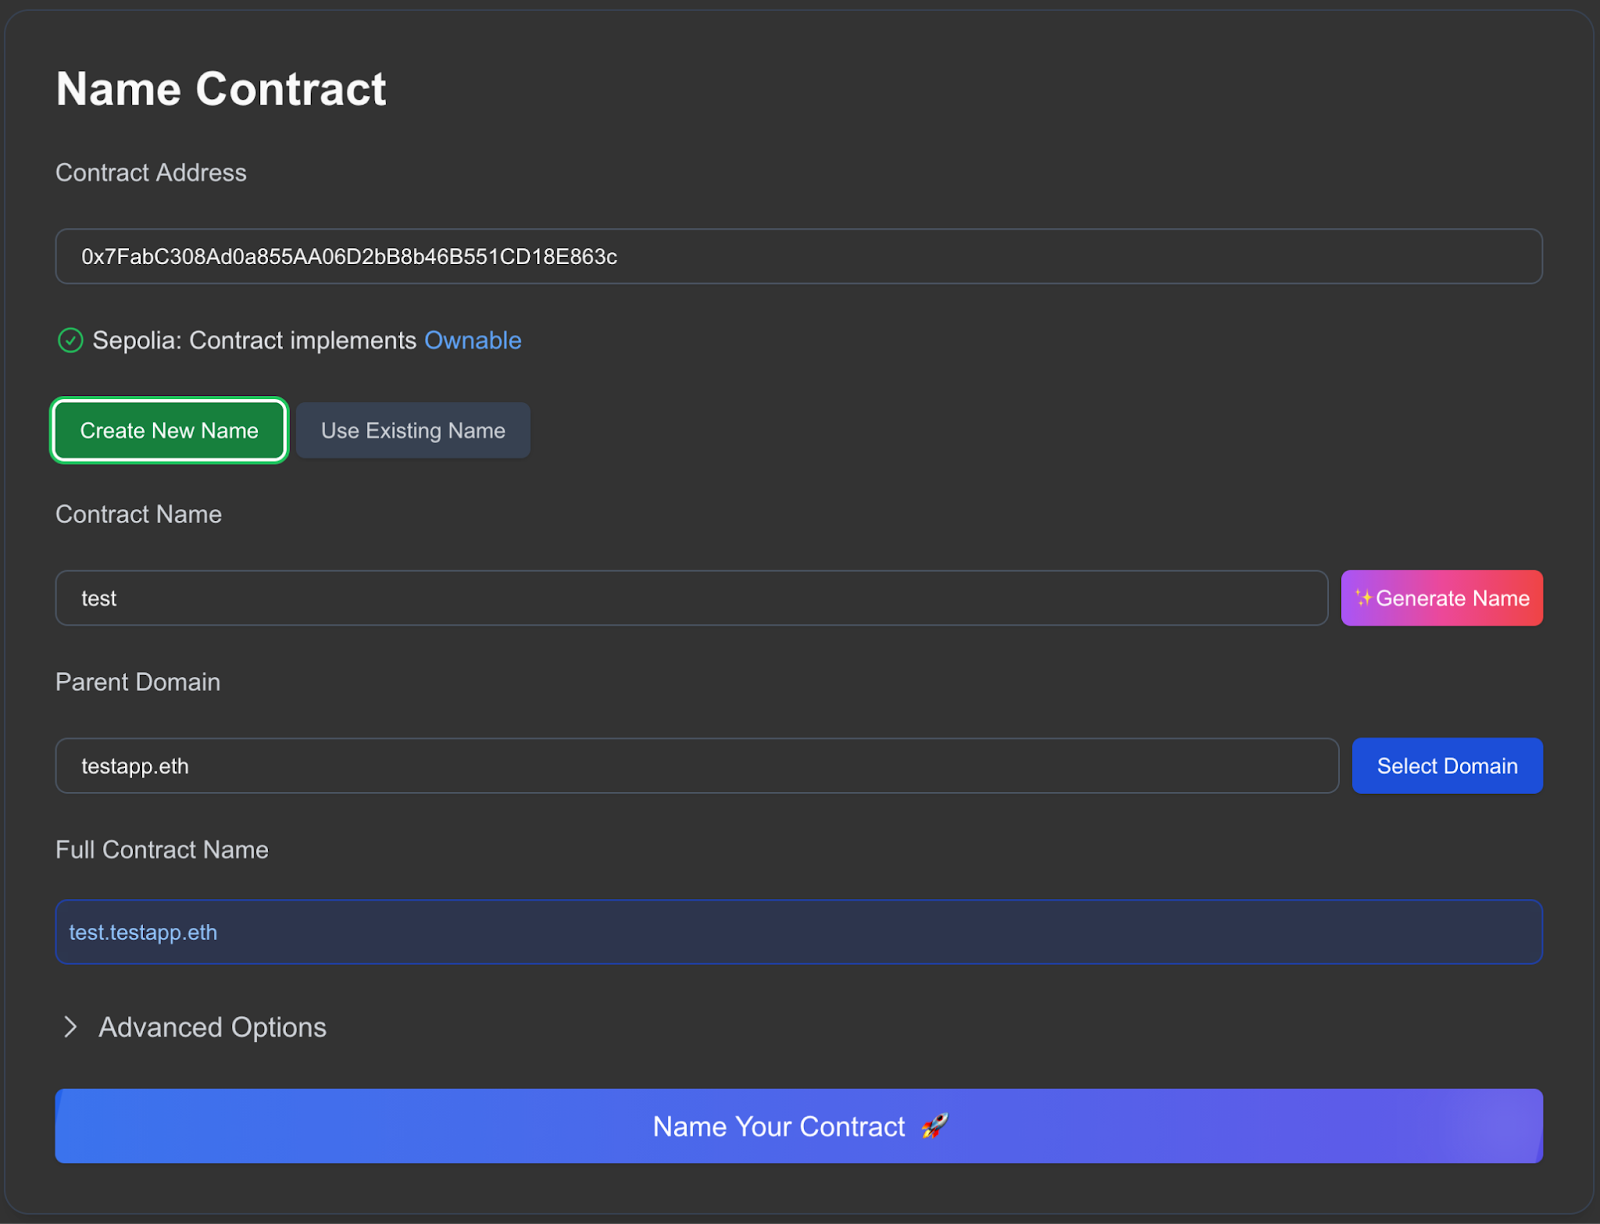
To try this out yourself, when you paste a contract address, pick a parent (e.g. myapp.eth), and type a name, Enscribe now shows the exact encoded function calls of the transactions that will be sent on-chain as individual transactions.
Each entry shows the target, selector, and ABI-encoded calldata:
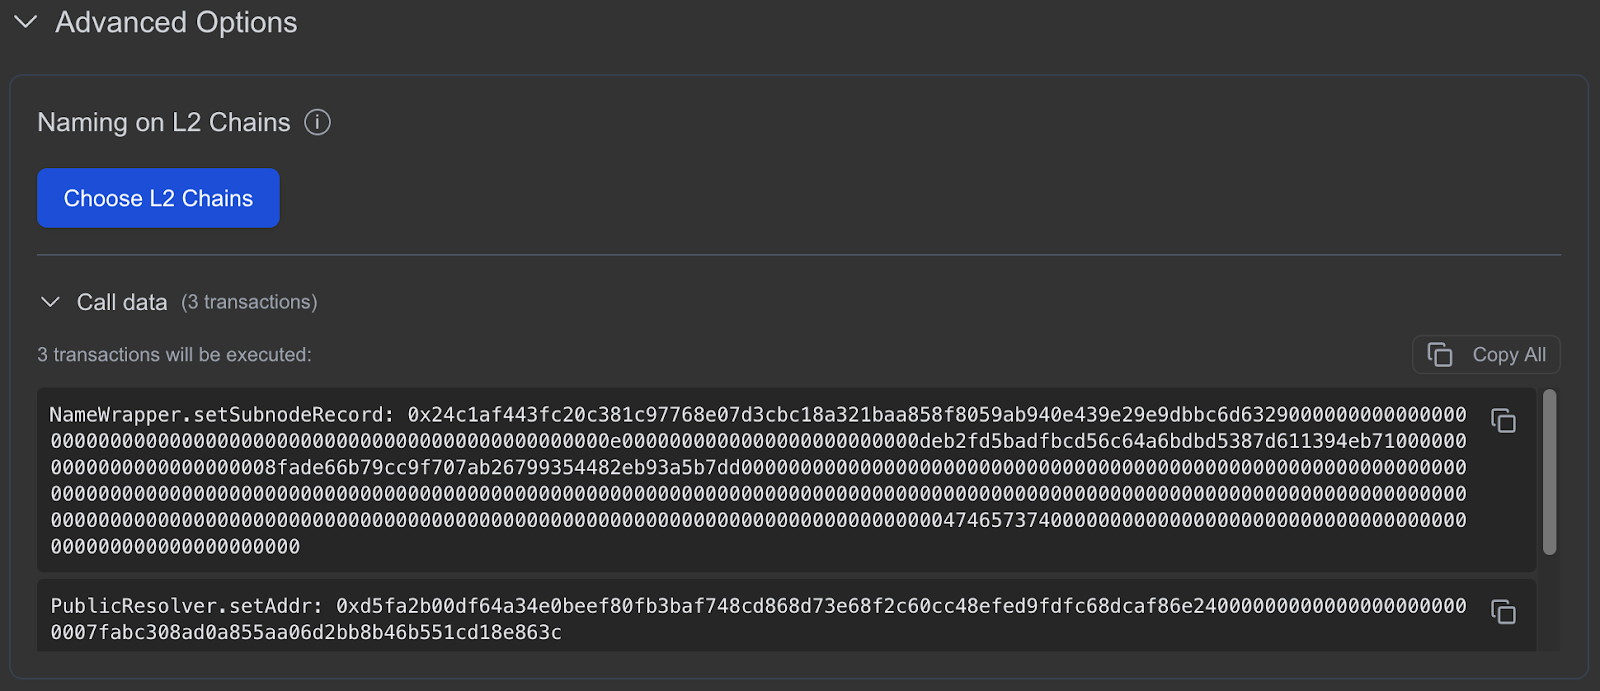
You can copy the individual calldata using the copy button displayed against it or you can also copy the entire calldata list in different forms by clicking on the Copy All button at the top of the list on the right side.
Realtime Updates
This isn’t a static blob. Change any of the inputs — address, label, or parent, and the calldata recomputes instantly. If you switch from router.myapp.eth to vault.myapp.eth, you’ll watch the encoded arguments update in place.
L2 Calldata
We also moved the Choose L2 Chains button into the Advanced Options section. L2 forward/reverse steps sometimes add extra calls (or different targets), and keeping them alongside the call-data preview makes it obvious what will happen. The calldata displayed also includes transactions that will execute on the L2 chain.
TLDR;
- Enter your contract address.
- Pick a parent (e.g., myapp.eth) and type a label (e.g., router).
- Expand the Advanced Options section
- Expand the Call data section
- Copy the calldata
So head over to the Enscribe App, enter the details about the contract you want to name and inspect the calldata generated in the Advanced Options section.
Happy naming! 🚀